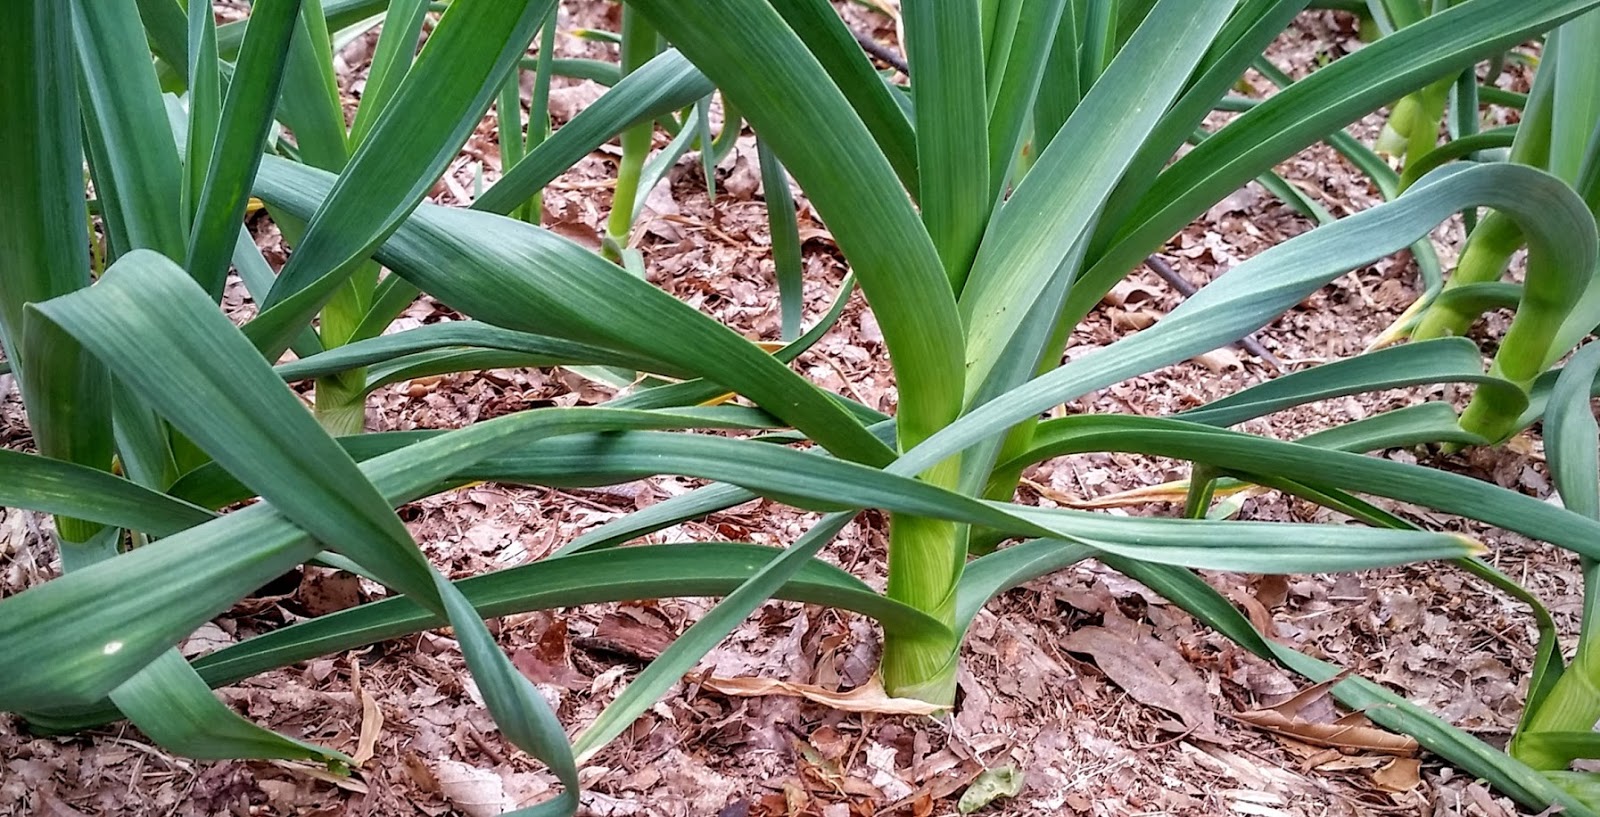
Spring’s green garlic, leeks, onions, scallions, shallots, and chives have arrived. These members of the allium genus are hardy, and are either perennials or overwintered after being planted last Fall. I have six garden beds dedicated now to different alliums.
Five types of garlic were planted last October. I purchased three types of seed garlic (garlic heads selected for planting) from Filaree Garlic Farm. Those are Inchelium Red (softneck artichoke type), Chesnok Red (purple stripe variety), and Montana Zemo (porcelain type). I also selected some interesting garlics purchased at our local Korean market. One appears to be an Asiatic type and the other a marbled purple stripe type. I will harvest a few heads green, but the rest will be pulled and hung to cure in June.
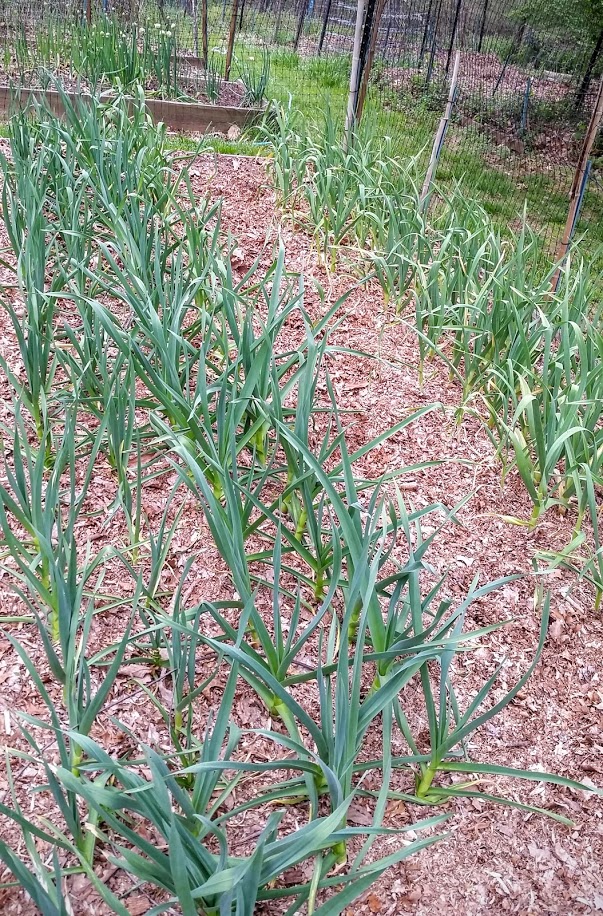
Another bed has leeks sharing space with asparagus. Leeks are planted one year as tiny seedlings, and then harvested as fat stalks the next year after enduring the winter. Elsewhere, I have a large planting of garlic chives. I let these naturalize as they are a handy, versatile ingredient wherever a green, garlicky punch is needed. In addition to being tasty, they produce loads of white blossoms to provide a much-needed source of nectar and pollen for our honeybees in the late summer.

Finally, there are three beds dedicated to producing scallions, bunching onions, green onions, and small onion bulbs. I always have great hopes of establishing this as a permanent situation, but I need to control myself to keep from using them all up. For the past few years, I have been planting packets of different bunching onion seed along with hundreds of Spring onion sets. This year I added hundreds of Egyptian walking onion sets to the mix. I think this might do the trick. All of these types of alliums produce green onions or scallions. Over the winter, their small bulbs divide to yield several new onions. If I harvest them by cutting them off at ground level, add a new layer of compost to the bed a few times a year, and keep it mulched, then the bed continues to produce a good supply for our table and enough to sustain the crop each year. Spring onions and bunching onions produce their flowers in the Spring. Letting these flowers go produces seeds to make the bed self-seeding as well.
This year I added Egyptian walking onions to the mix. These alliums got their name due to how they multiply. Instead of producing flowers, they produce clusters of small onions at the top of the stalk. Those onions weigh down the stalk, causing it to “walk” and plant more onions. I always have loved these onions because the larger top set onions are great to pearl onions to go in pickled giardiniera, jars of cornichons, or to add into other dishes like roasts. They are a nice red color, too. The problem I’ve had is that they are so good, I end up eating them all and not leaving enough to maintain the planting. Hopefully I have solved that problem. This year I found a place that sells the top clusters in a flat rate shipping box. The box had hundreds and hundreds of bulblets, and they are growing like mad.
When people see all of these onions, they usually ask how in the world we eat all of them. Actually, it is all too easy to eat all of them, and that is what I do not want to do! Still, we will eat a lot of green onions. I love them in salads, heaped on top of sous vide duck tacos with hoisin sauce, in stir fries, in yogurt, mixed into fresh homemade lactic cheese with a bit of smoked paprika (an excellent dip), in cecina, etc. I like to eat them plain as a snack, but it does give very pungent breath!
An excellent way to use Spring’s alliums is to make kimchi. Spring kimchi is wonderful with all of the fresh Spring vegetables. Here are two types of kimchi featuring Spring alliums, one with radishes and one with Napa cabbage.
Radish Kimchi
1 Korean radish, about 2 to 2-1/2 pounds, peeled and diced ¾”
8 large Spring onions white part sliced ¼” and green part 1”
2T minced fresh ginger
6T minced garlic
8T Korean red pepper flakes
2T salted baby shrimp, rinsed and minced
1T Korean sea salt
2t sugar
Mix all ingredients well. Put in sealed non-reactive container. Store at room temperature for 24 hours. Refrigerate. Ready to eat. Makes about two quarts of kimchi.
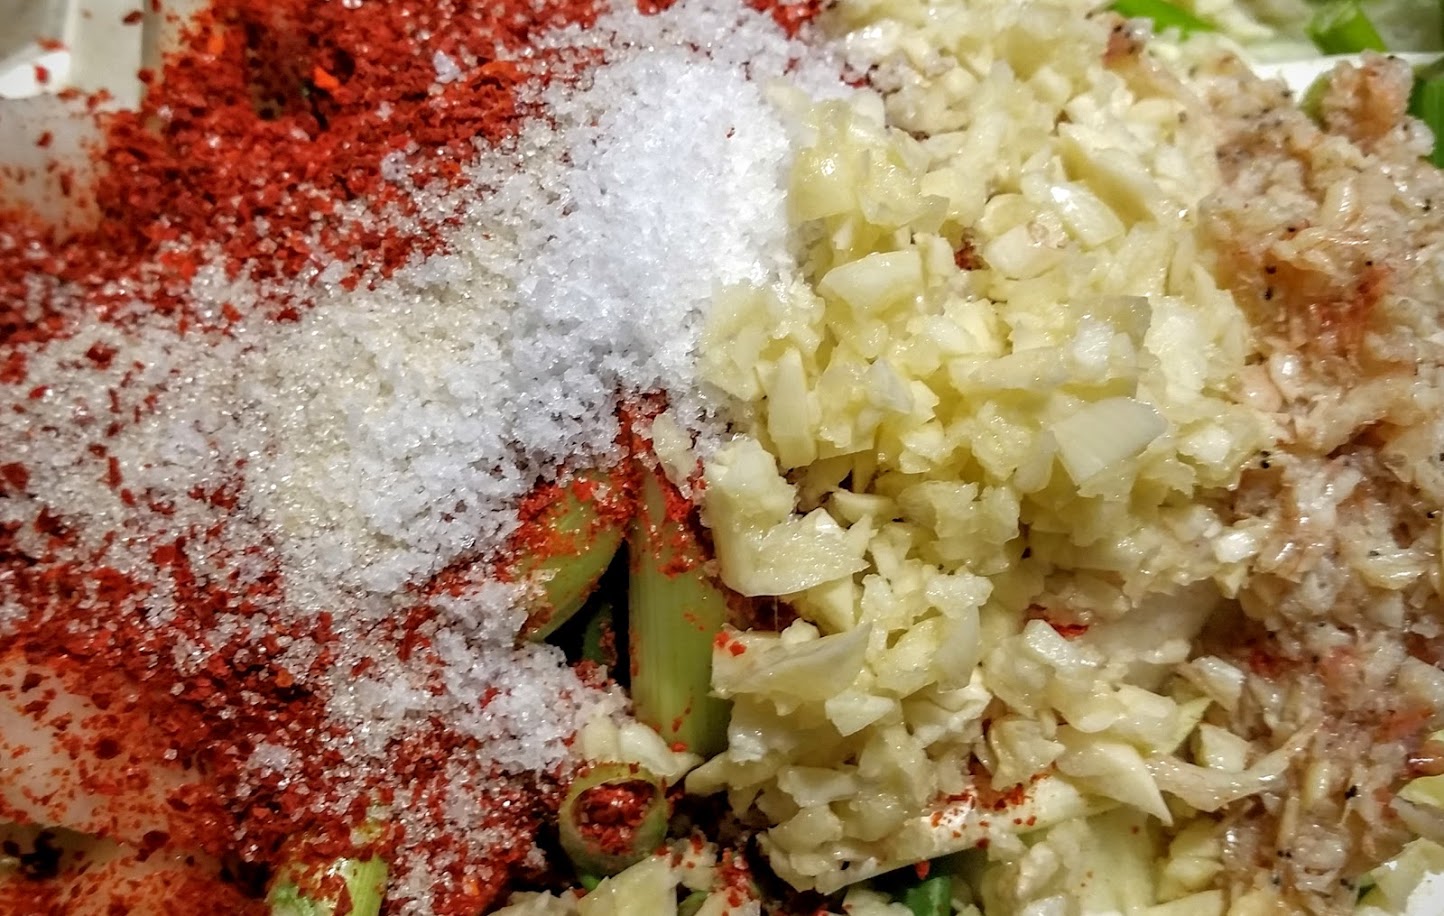 |
| All ingredients in place |
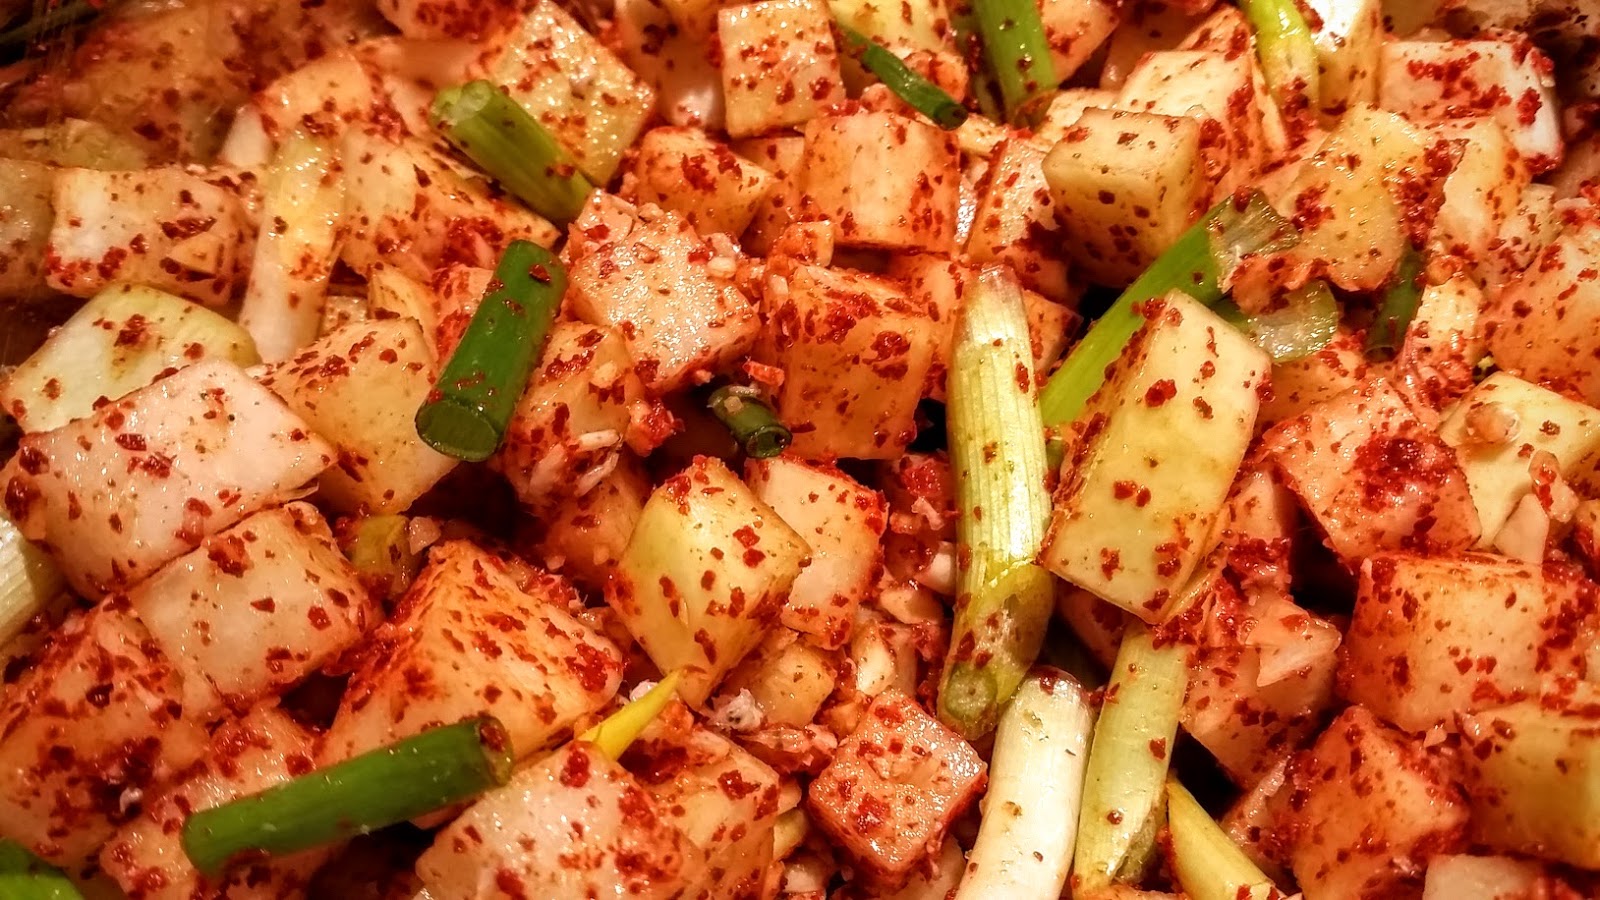 |
| After mixing, ready to ferment |
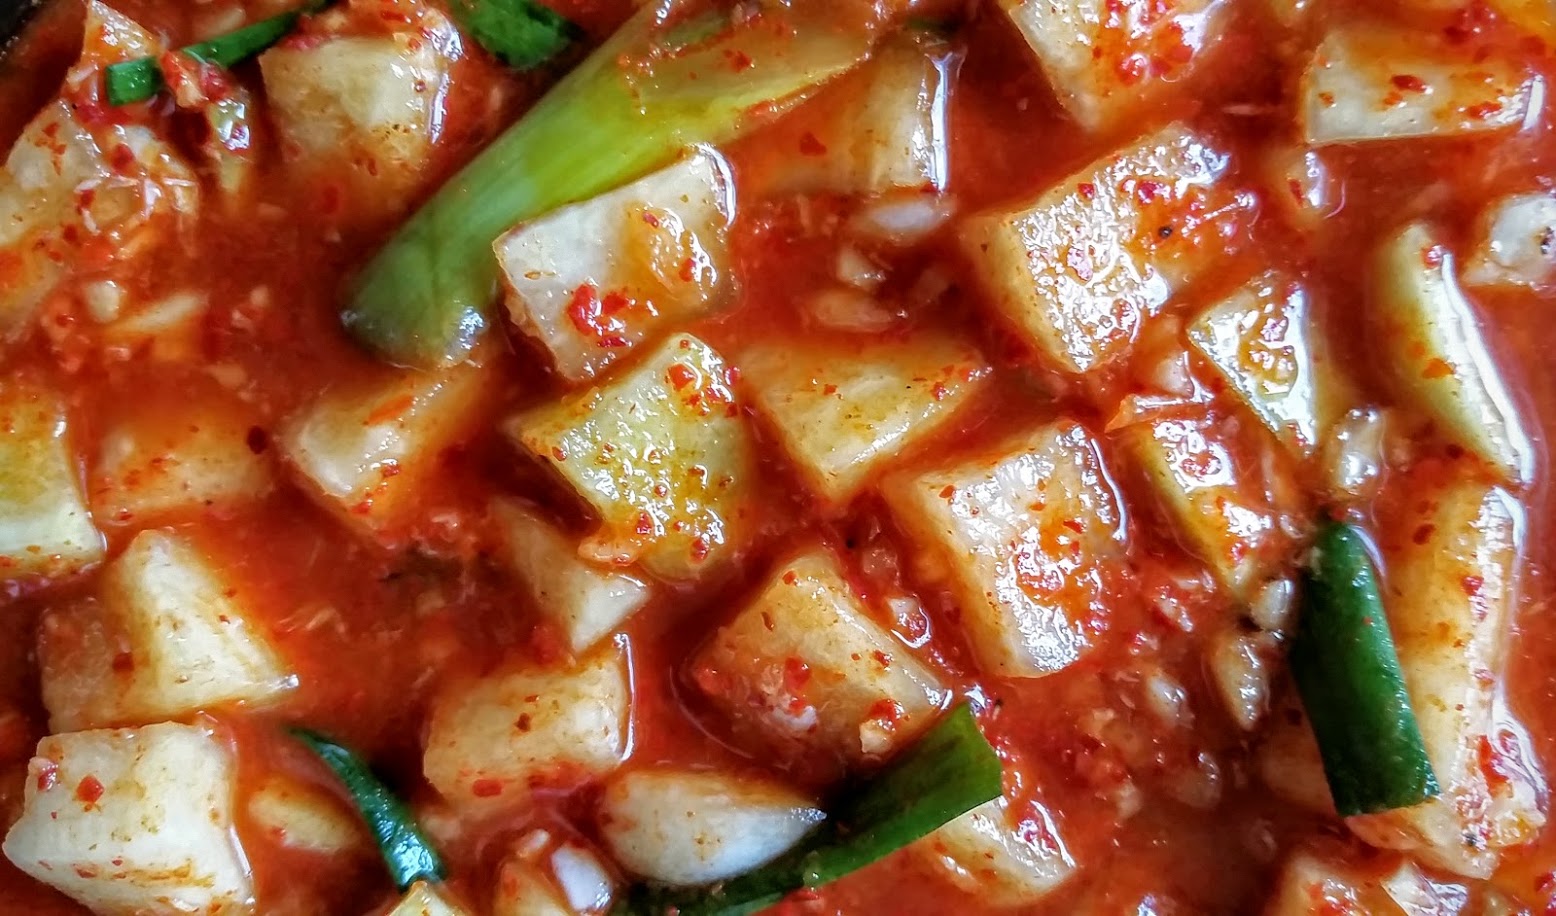 |
| Ready to eat! |
This kimchi can be my lunch on its own or with a small amount of rice. I really like this one added to a bowl of hot ramen soup.
Napa Cabbage Kimchi
½ large head of Napa cabbage, well washed and cut into three wedges through the core.
1 cup Korean sea salt dissolved in 6 quarts of water
6 cloves garlic thinly sliced
2T fresh ginger cut in fine julienne
6 cups roughly chopped garlic chives
3T fish sauce
Soak the cabbage wedges in the salted water for 3 or more hours until the cabbage is very limp. Rinse the cabbage in cool fresh water to remove salt. Mix remaining ingredients in a bowl. Rub this mixture over the cabbage, making sure to get some in between the leaves. Pack the cabbage tightly in a sealed non-reactive container. Store at room temperature for 24 hours. Refrigerate. Ready to eat. Makes about two quarts of kimchi.
This kimchi is also excellent on its own. It can be added to a stir fry of pork belly, or served alongside roasted or grilled meats and vegetables.
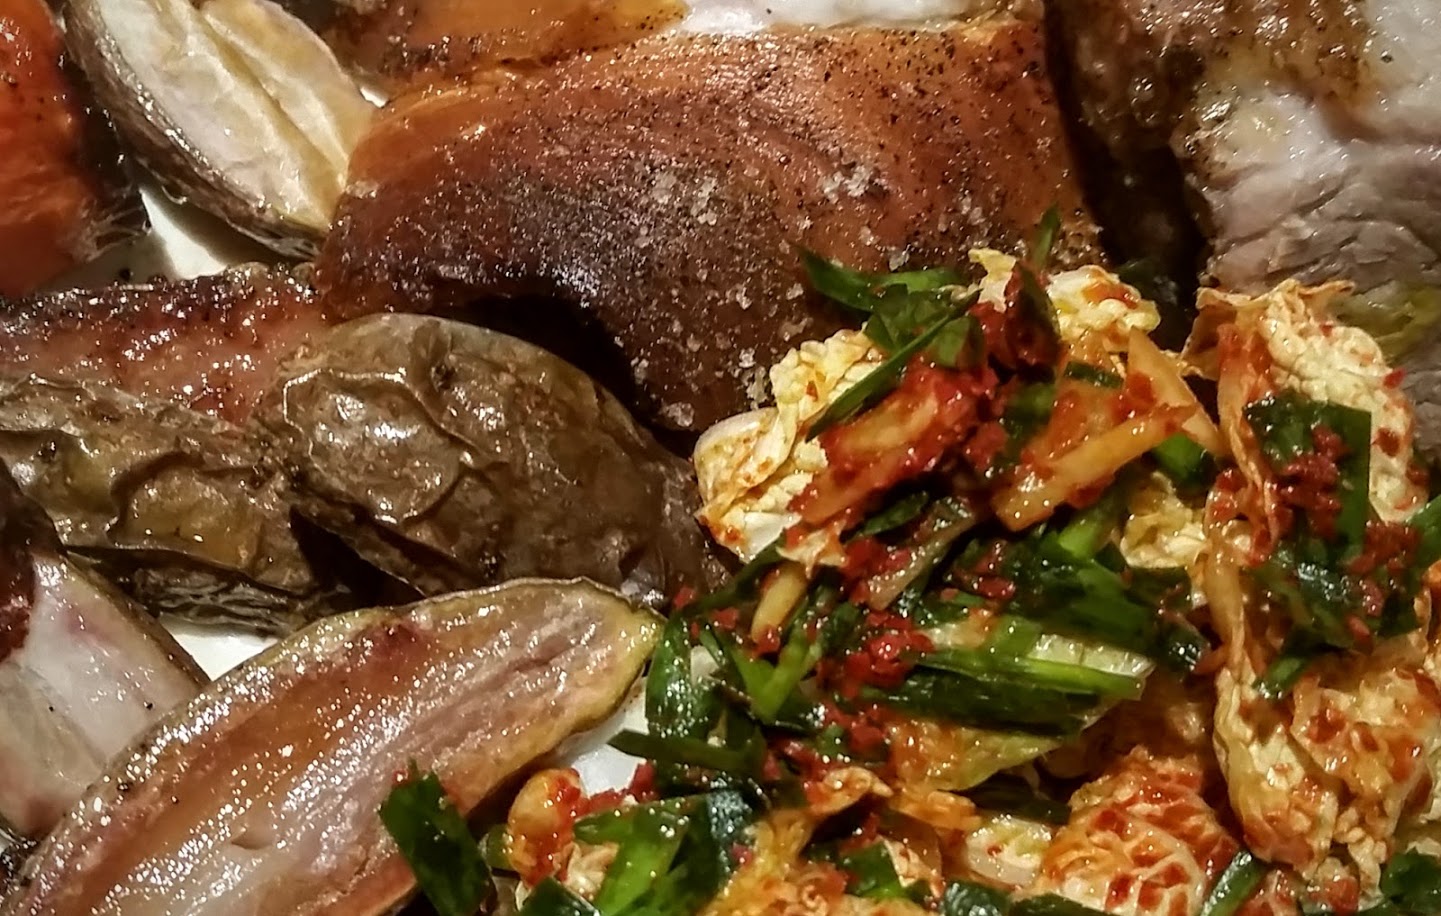 |
| Napa kimchi with roasted crispy skin pork, fingerling potatoes, carrots, and garlic |

One thought