Here’s another recipe that uses the fresh tamale masa featured elsewhere in my blog. This time it is a tasty Dutch Oven Tamale Pie. While I concocted this recipe for outdoor cooking on a recent camping trip, it can easily be made at home in your oven.
I love to camp, and have always seen it as a challenge to make some really good food in the great outdoors. Of course, the type of camping often dictates the feasibility of equipment and ingredients. Long backpacking or canoe treks typically require lightweight stoves and limited cookware and ingredients are often dehydrated or freeze dried. A lot of backcountry campers eat just for fuel, but that is not my way. I just do not find those prepackaged freeze dried meals to be palatable. I have learned to make very good meals using ingredients found at ethnic groceries and bulk food sections. The main tricks are to use ingredients that impart a bright flavor and to not get into a rut with too many meals on the same theme.
For car camping, river canoe trips, and other types of camping where you don’t have to tote gear for long distances, a larger set of possibilities develops. Fresh food can be brought in iced coolers, and here is where some of the fun toys come out. I have a battery operated rotisserie, for example. Larger stoves and grills can be used. And heavy cast iron cookware. The king of cast iron has to be the Dutch oven. So many great things can be made in a Dutch oven, and it really doesn’t take a lot of fire. In fact, the fewer coals you have, the lower the chances you may burn dinner.
I have two Dutch ovens for camping (several more for home oven use, although the camping units sometimes get used in the home kitchen as well). The first camping Dutch oven is a Lodge model. I have had it for over 30 years. I got it when I was setting up the kitchen in my first apartment after college. I saw an ad in the newspaper for a nice set of cast iron cookware at a cheap price. I went to the store and found they were all sold out. A helpful clerk told me I could take a cart to the storeroom and fill it with as much unboxed cast iron as I wanted, and they would charge me the same price. Sold!
This first Dutch oven is smaller, and is really well seasoned after much use. The problem with it is that it has a domed lid, so in a fire, you have to be exceptionally careful when removing the lid. Otherwise, you can spill a bit of coals and ash into your nice dish. It’s been on many trips and has been in many campfires; pots of mussels on the beach at Assateague Island, pots of campfire chili, and too many cobblers to count.
My second Dutch oven was also pretty inexpensive. I bought it from a tool catalog. To make it work better, it needed a little filing and a very good cleaning. Actually, several good cleanings because there was quite a bit of residual grit from the casting process. But now it is fully seasoned and it works very well. Seasoning a Dutch oven is critical to make sure foods do not stick. Some folks line a Dutch oven with foil, but I really don’t like that. I mean what is the point of doing some nice cooking if it’s nested in foil? If a Dutch oven is properly seasoned, clean-up is as simple as a quick wipe with a moist cloth and a dry towel.
This second Dutch oven has a rimmed lid that holds the coals and keeps them from spilling over the edge into the pot when the lid is lifted to reveal its spectacular contents. It’s also larger to feed more folks if needed. Always a good thing!
About once a month, we go camping. I was thinking of things I could make for dinner using the Dutch oven. A tamale pie is not a new concept, but I wanted to see if I could elevate it a bit and also explore ideas that could be used as the basis of other dishes in the future. As several recipes on my blog indicate, I have been playing with fresh masa for some time now. I decided to use tamale dough as my “crust.”
I also wanted to do most of the prep work at home to simplify the work that needed to be done at camp. The pie could have any number of delicious fillings, but I chose to make chili for this version. Of course my mind was already drifting to thoughts of chicken in tomatillo sauce, turkey mole, chili colorado, picadillo…so many things. OK, I stuck with chili.
I made the masa and chili at home ahead of time. I made enough extra to make a test batch in the oven just to be sure that it would work and so I would know what to expect when I made it outdoors with fire.
Tamale Masa (about 8 cups of masa, enough for two tamale pies)
4 cups of large kernelled corn (I used half Peruvian Mote Blanco and half of another type of Peruvian field corn)
2 quarts water
2T Cal Mexicana (hydrated lime)
2 cups rich veal stock
2t Baking Powder
1 cup rich golden lard (can use shortening as well if you prefer)
Salt to taste
Wash the corn in a colander and place in a large pot. Add the two quarts of water and the Cal Mexicana. Bring to a boil, and boil for 15 minutes. Allow to sit, covered, for two hours.
After two hours, wash the corn in a colander. Squeeze fistfuls of the corn to pop the kernels out of their thin skin. Periodically dump the corn back into the cooking pot and swirl with clean water. Back into the colander for more washing. When the corn is clear with water in the cooking pot, washing is complete. If you fail to wash sufficiently, the corn will taste of the Cal, and you don’t want that.
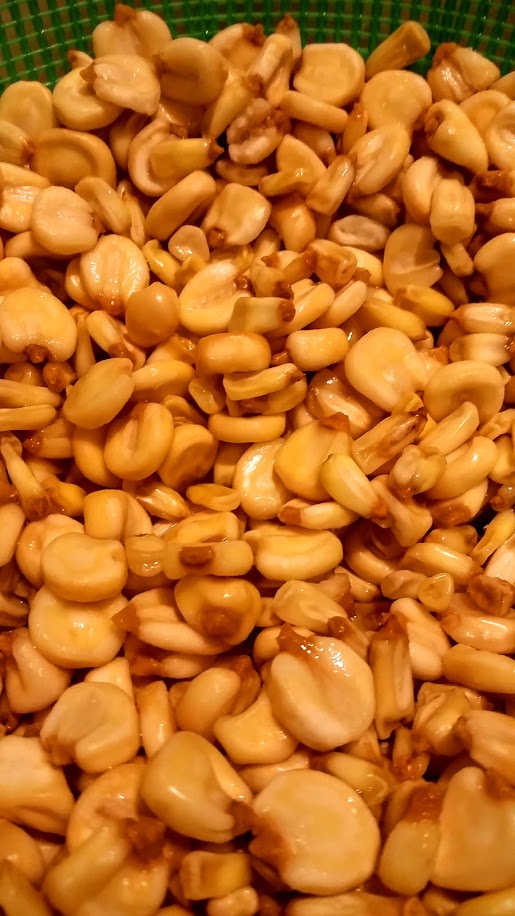 |
| Nixtamalized Corn |
Run the corn through a meat grinder with the finest plate. My grinder’s finest plate is 1/8 inches. After the second grind, the corn is like a paste with some small granular texture. That is perfect.
Place the ground corn in the bowl of a stand mixer. Mix in the lard, veal stock, and baking powder. Taste and add salt. You can also add some hot sauce if you like.
 |
| Finished Masa |
Refrigerate the masa to firm it up a bit.
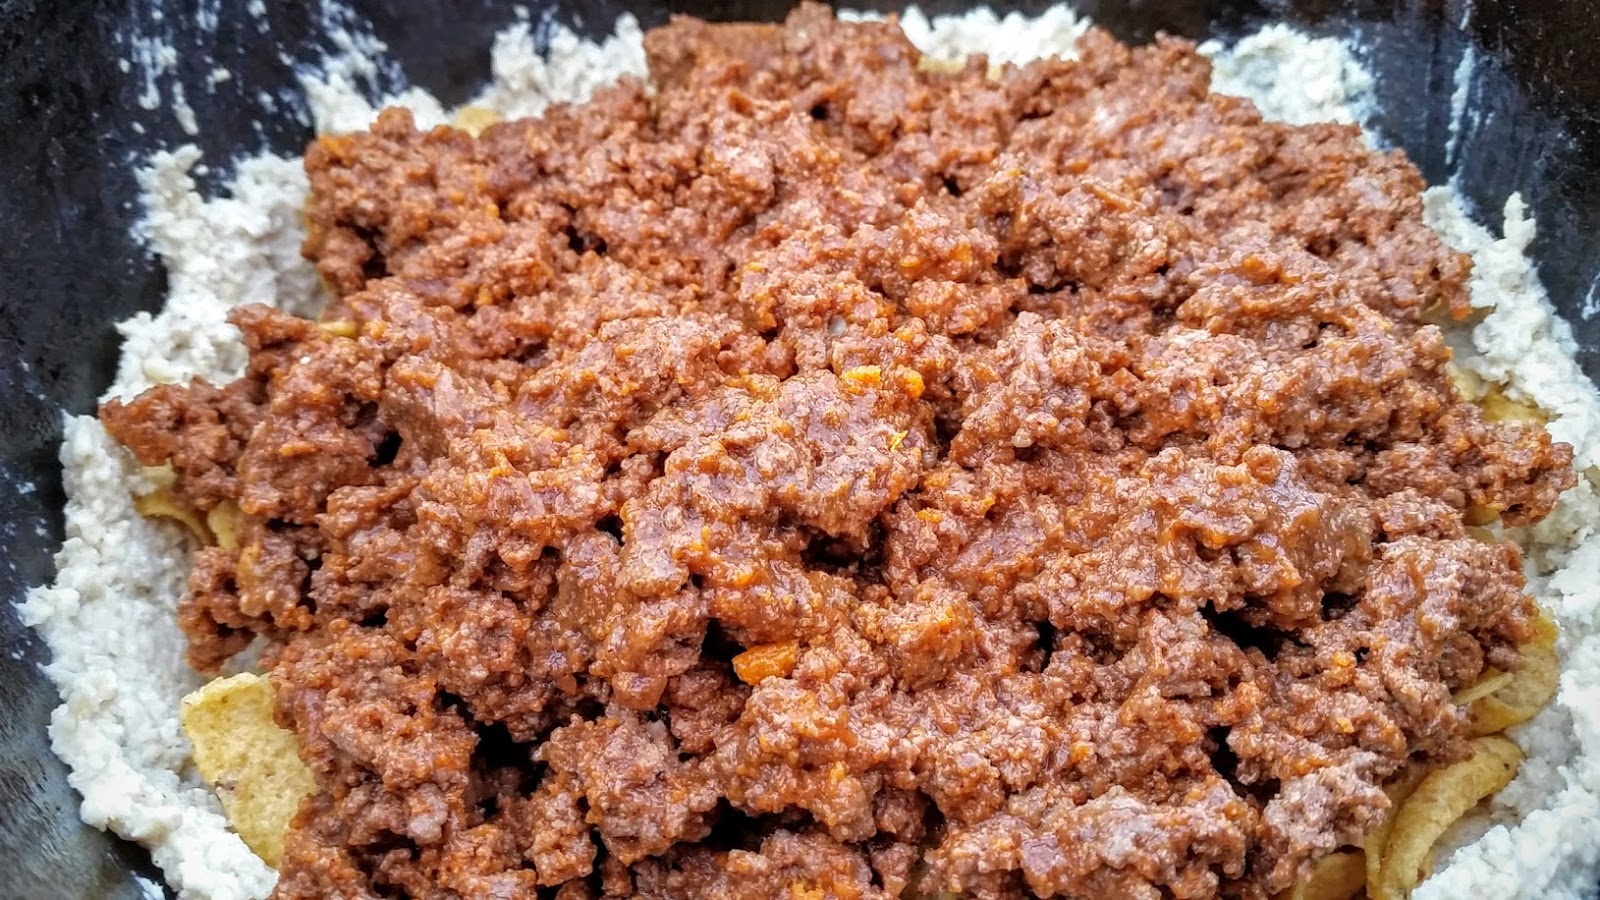
Next, make your filling. Again, I made chili. I kept it simple, not my competition chili. I used a pre-mixed spice package for Hard Times Terlingua Red (which I won as a prize in a chili cookoff). The recipe used 2-1/2 pounds of ground beef, the package of spices, 2 cups of homemade veal stock, 2 cups pureed tomatoes canned from my garden, and 2T tomato paste. I also added a bit more cumin and Mexican oregano, and I finished with a dash of apple cider vinegar. This made about 2 quarts of chili.
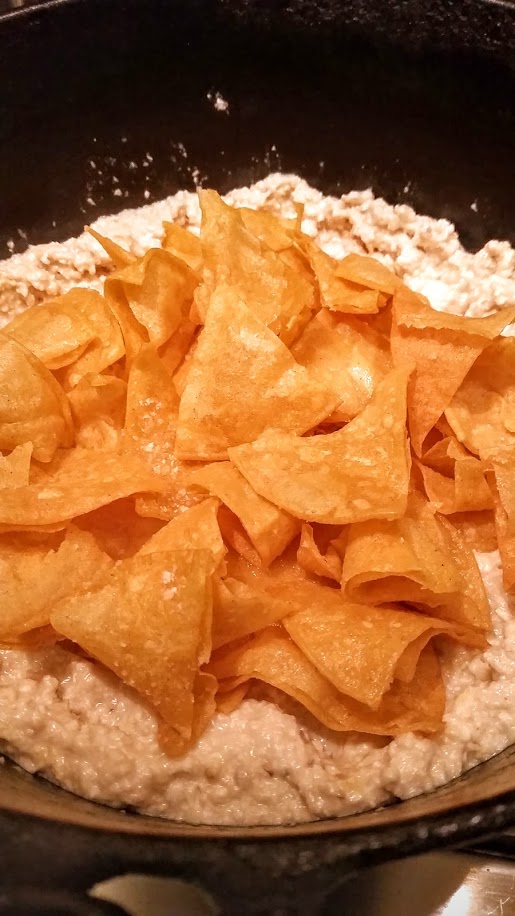
I wanted a bit of crunch in there, so for the pie I made at home, I fried up some corn tortilla wedges into crisp corn chips. I gave them a dose of salt right from the fryer. For the camp pie, I used Frito’s corn chips. Who doesn’t like Frito pie? Not only do the chips add crunch, they also keep the chili from making the masa crust too soggy.
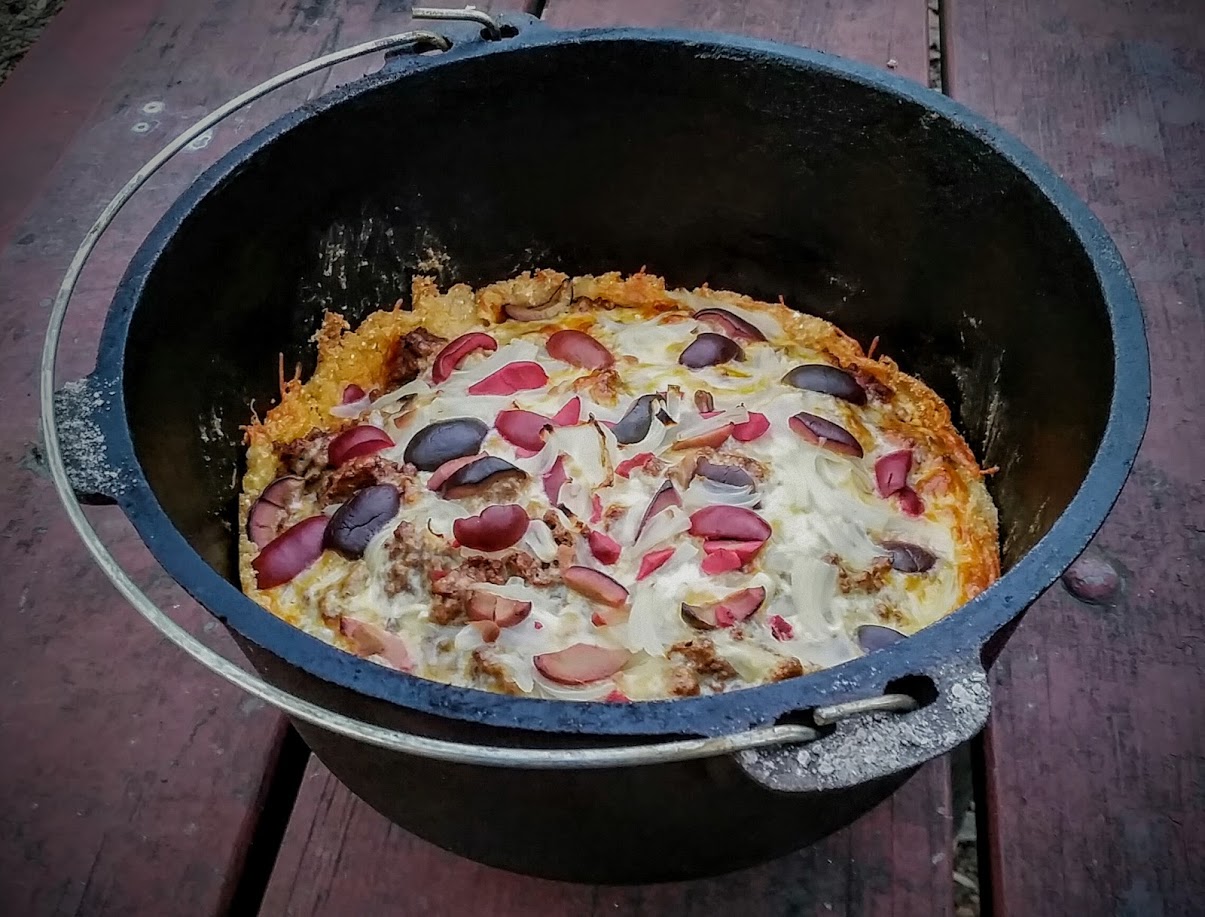
To assemble the pie, I spread a layer of masa about ½ inch thick on the bottom of the Dutch oven. Then I placed spoonfuls of masa around the edge to contain the fillings. I smoothed it all out with the back of a moistened spoon. This took about four cups of masa in my Dutch oven. Next, the masa was layered with the chips, and then the chips were topped with about a quart of chili. I sprinkled the chili with 4 cloves of minced garlic.
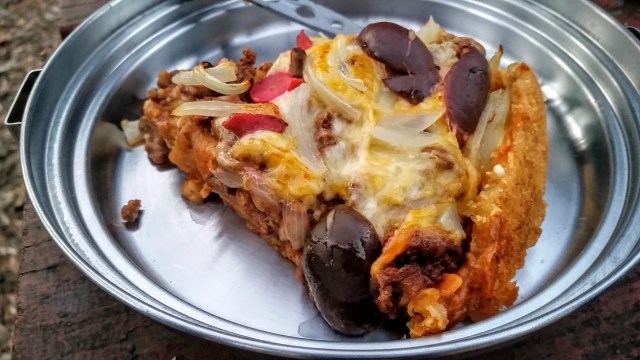
The chili is topped with cheese. At home, I grated about 2 cups of cotija cheese. At camp, I used shredded blend of Mexican cheeses. Both worked very well. I topped the pie with julienned strips of onion and two kinds of good ripe olives. Put the lid on the Dutch oven and bake.

To bake in an oven, preheat the oven to 400F and cook for about 30 minutes. At camp, I set the Dutch oven over six good coals and then put about 15 good coals on the lid (enough coals to cover the lid in one layer). A general rule of thumb for Dutch oven campfire cooking is about twice as many coals on the lid as there are under the oven.
 |
| The Dutch oven is in a Volcano grill that holds it very nicely with the coals |
Resist the urge to peek into the Dutch oven. I have found a good way to judge progress in a Dutch oven is to position yourself downwind from the oven. When the contents begin to cook, you start to smell the steam coming out of the oven. When I started to smell toasted corn, I knew it was doing well. Then when the smell of corn also had the smell of hot chili and melded cheese, I knew it was close. Lift the lid and take a peek, more time if needed. Lightly browned on top and crusty on the edges…done!
I wasn’t sure how spicy my fellow campers could take it, so I served some of my hot sauce and pickled jalapenos on the side. Everyone came back for seconds, and it was a big hit.

One pie served 6 hungry adults. It would be 12 servings if served as part of a larger meal.


3 thoughts