Turkeys are available on the cheap around Thanksgiving Day in the US. This year is no different with turkeys going for as little as $0.47 per pound, plus many stores run specials where they will take additional $$ off of the total bill. I always buy a few frozen turkeys this time of year to have on hand to make deep fried turkeys later when the cost of the very same type of turkey can be as much as 8-10 times what it costs now.
I got the jump on cheap turkey season this year, and with the success of my cold-smoked, cured pork loin, I thought I would do the same with a turkey. This one is a winner, too!
This turkey roll takes a bit of work to prepare, but the resulting masterpiece can be served as the centerpiece of an easy meal, sliced for sandwiches, or as an item on an elegant charcuterie platter.
Boning the turkey is the first step. Make sure you have a very sharp boning knife for this step. There are plenty of videos on line, but the process is quite simple.
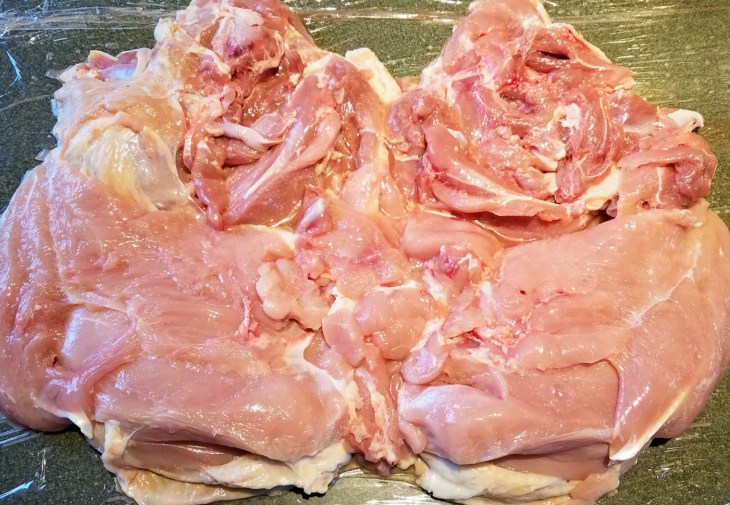
I covered my counter with overlapping layers of plastic wrap to contain any mess. Start with the breast side up. Slice along both sides of the breast bone, and then work down along both sides of the rib cage until the wing and thigh joints are exposed on both sides of the bird. Use the tip of the knife to pop the bone out of each of the four joints (2 wings and 2 thighs). Continue to work around the carcass of the bird to free the carcass from the meat and skin. Toss the carcass in a stock pot to make some tasty turkey stock.
Remove the wing tip and middle joint from each wing, and put them in the stockpot. At each disjointed wing, work around the end of the bone with the knife until you can pull up on the bone and then clean all the meat from the bone. Pop out the wing bones, and toss them in the stock pot. Do the same with the thighs, stopping when you get to the drumstick/leg joint. Pop out the drumstick joint and put the thigh bones in the stockpot. Repeat the process with the legs. Pull out the sinews from the exposed leg meat. Drumstick bones and sinews go in the stockpot.
No waste! Cover the bones in the stockpot with water, add onion, celery, carrot, garlic, bay leaf, thyme, parsley, salt and pepper, and set it on low heat for a long, slow simmer. I’ll assume folks know what to do with this. We need to get back to our project here!
The next step is to make the cure for the turkey. To compute the amount of salt, we need to weigh the meat. I started with a turkey about 12 lbs., just over 5kg. The de-boned turkey weighed 3200g. So here is what I did for the cure; the critical items to measure are the salt and the cure #1. Those are at 2% and 0.25% of the weight of the meat, respectively. Once you have those, the rest can be varied to your own preferences.
Turkey Cure
3200g de-boned whole turkey (a de-boned turkey breast will work for this, too)
64g smoked salt (2%)
8g Cure #1 (0.25%)
12g freshly ground fennel seed
2g freshly ground chile petine
5g smashed juniper berries
14g freshly ground white pepper
10g granulated garlic
Mix the cure ingredients well, and then evenly rub the cure all over the turkey. Make sure to get in all of the small crevices. All of the cure must be used since the salt and cure #1 are computed by weight. Place the turkey into a large zip top bag (if your bag is large enough, you can apply the cure in the bag to make sure it’s all included). Squeeze out as much air as you can. Place into the refrigerator. Flip the bag over every day for at least 4 days or up to a week. This will make sure the salt and cure reach equilibrium in the meat.
After curing, remove the meat from the bag and place in a large non-reactive bowl or container (I used a small plastic food lug). Rinse with white wine. I used a bottle of Sauvignon Blanc. This will wash off most of the spices, but they have already done their job.
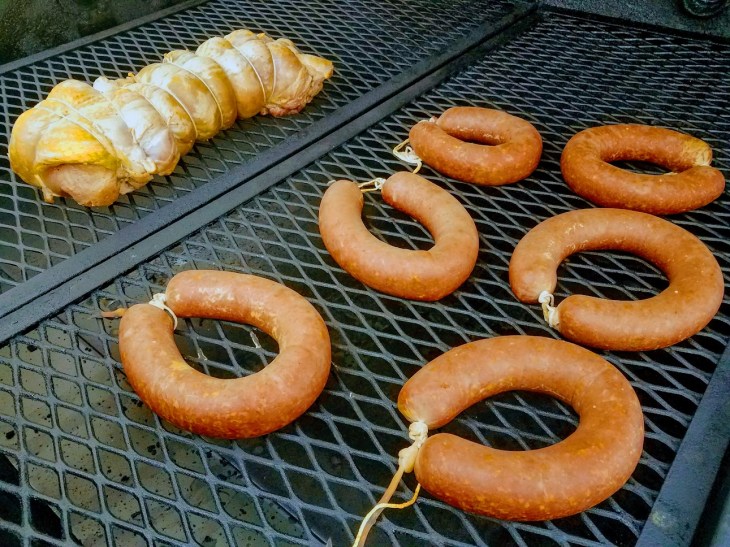
Dry off the turkey and loosely roll it up making sure to get it as even as possible. The breast end will be a little thicker then the let end, but try to get it as even as you can by moving some of the loose parts around. You can remove the tenders, for example, and shift them to the leg end. Tightly tie the roll with twine using butcher’s knots (slip knots). At this point, you can net the roast if you’d like.
Set up your smoking apparatus for cold smoking. Apply cold smoke (<85F) until the desired color is achieved. I smoked mine for 30 hours, keeping the temperature under 60F. I used apple wood chips as described in yesterday’s post on garlic ring bologna.
The turkey still needs to be cooked at this point. I performed this step using sous vide. The precision control of the cooking temperature preserves the flavor, texture, and moisture of the turkey.
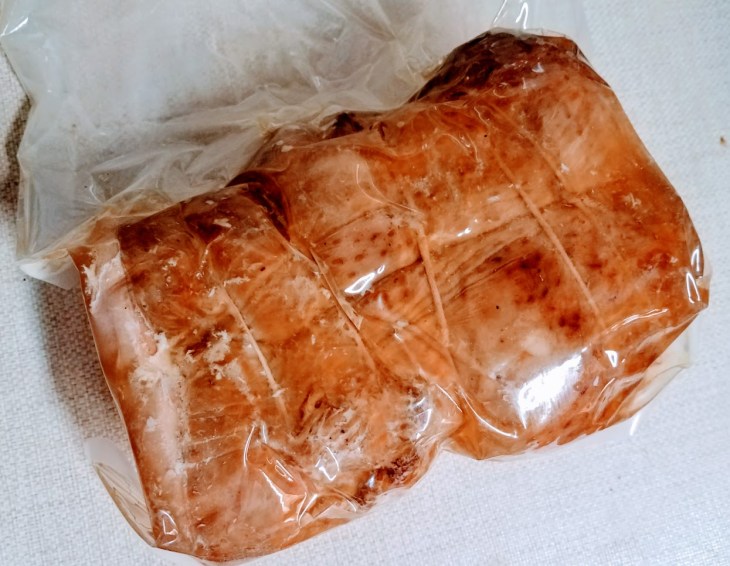
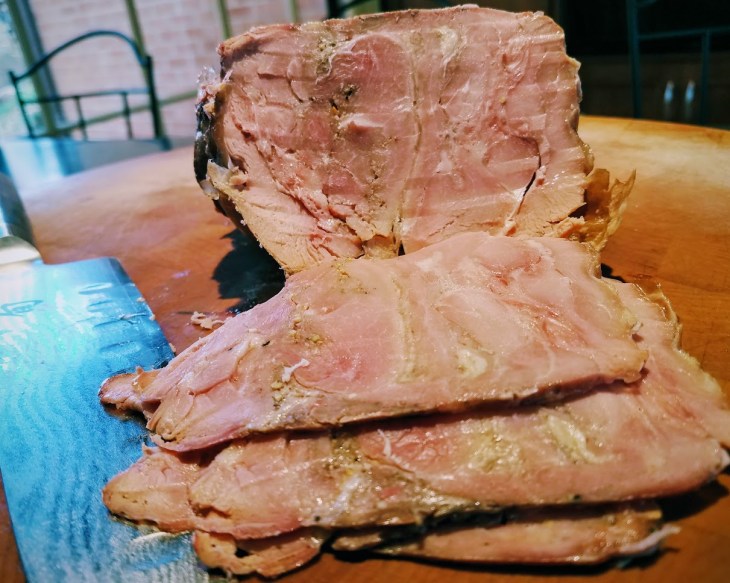
To fit the turkey into my vacuum sealer, I had to cut the roll in half. Preheat the sous vide water bath to 147F. Place the bagged turkey into the bath for four hours. The resulting quality of the meat is beautiful. The two bags came in handy so we have one to eat now, and one to save for later during the busy holiday season.


It looks great and a bottle of wine and I am loving it.
LikeLiked by 1 person