Like any serious cook, I keep a supply of various salts on hand. Boxes of Morton’s Kosher salt, bags of my go-to Korean sea salt, sel gris, the famous gray sea salt of France, and crunchy coarse flakes of Murray River sea salt from Australia (excellent on fresh salad greens or to finish a steak). I knew of the famous Trapani salt of Sicily, and was eager to visit the local salt pans during our recent trip to western Sicily.
Salt was a critical commodity in the ancient world, and people went to great lengths to obtain it. The primary use for salt was to preserve food, among many other key uses. The production and distribution of salt was tightly managed within ancient civilizations. The word “salary” has its origin in salt, as folks were paid in rations of salt.
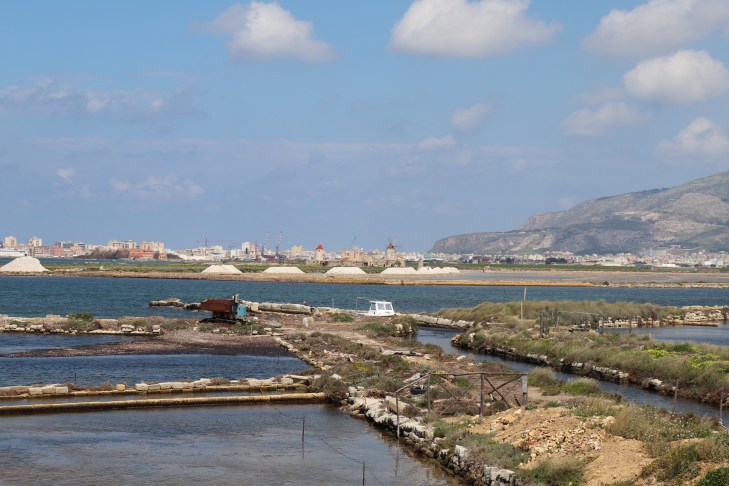
Phoenicia, originating in about 1500 BC, was a seafaring empire in the eastern Mediterranean region to the west of the fertile crescent. They recognized the west coast of Sicily as a prime location to produce high quality sea salt, and established salt pans there nearly 2700 years ago. The critical elements to produce this salt are: water depths less than 1 meter, steady dry winds to promote evaporation, rain-free season in late summer, and a hard sea floor to allow the pure salt to be separated from the mud (sel gris gets its gray color from the minerals of the earth forming the base of its salt pans). The salt pans of the Trapani area have been in constant operation since the days of the Phoenicians.
Driving along the coast between Trapani and Marsala, the shoreline is almost a continuous array of salt pans. The entire area is now a protected marine reserve in cooperation with the World Wildlife Fund. We stopped and took a tour of the Museo delle Saline in the small town of Paceco.
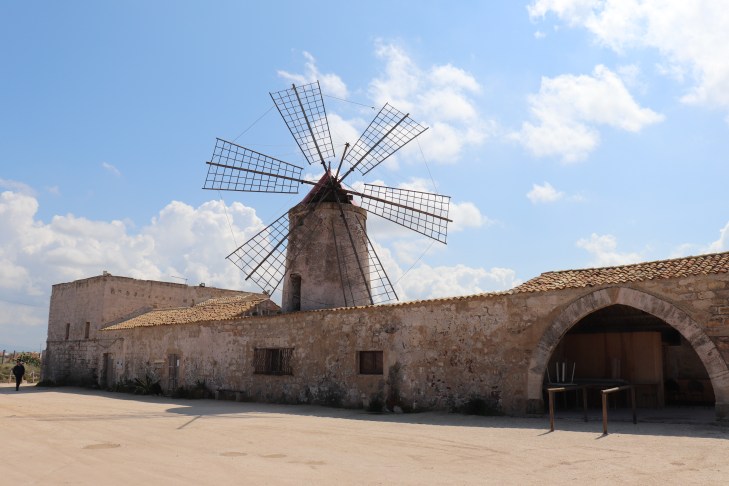
The museum is an active sea salt production operation. Much of its infrastructure dates to the 17th century. The methods of salt production are largely unchanged since then. Fresh sea water floods the main collection pan with water in Spring. It is about 7% salinity. Over the next several months, the water increases in salinity and it moved to smaller and shallower ponds. Wind power is used to pump the water from one pond to the next.
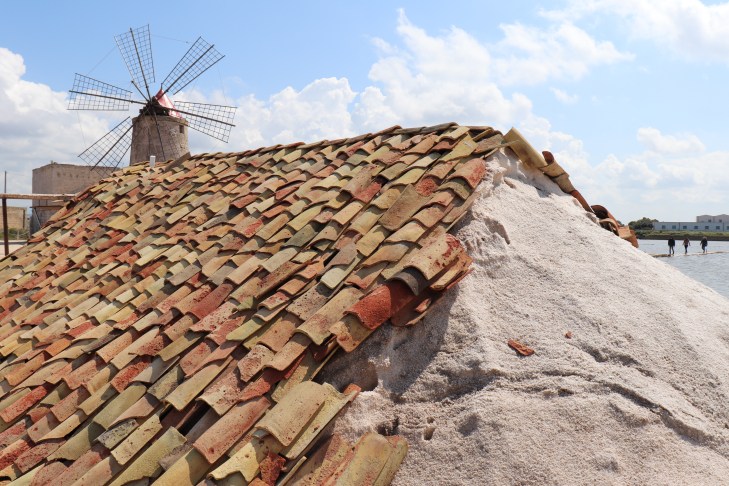
By August, the salinity reaches the point of saturation and the salt begins to precipitate in a bed. High salinity water is added to this bed and continues to build the layer of salt. At its peak, the layer of salt may be 15-20 centimeters thick. This is unique to Trapani salt and contributes to its pure white color. Other locations where the salt bed is thinner and the seafloor is more silty, the silt adds color (along with flavor and minerals) to the salt.

The water is then drained from atop the salt bed, and the salt is harvested by chopping and raking into piles for collection. Before the marine reserve was created, draining the pan would also produce many tons of high quality fish.
The museum is a family run business. Our tour guide explained that his grandfather took out a loan and bought the operation as a risk-taking young man when the operation was nearly destroyed by a vicious storm. He restored it to profitability, selling the prized salt and fish. Over time, they added the museum, to share the story of the salt, and a highly rated restaurant on site.
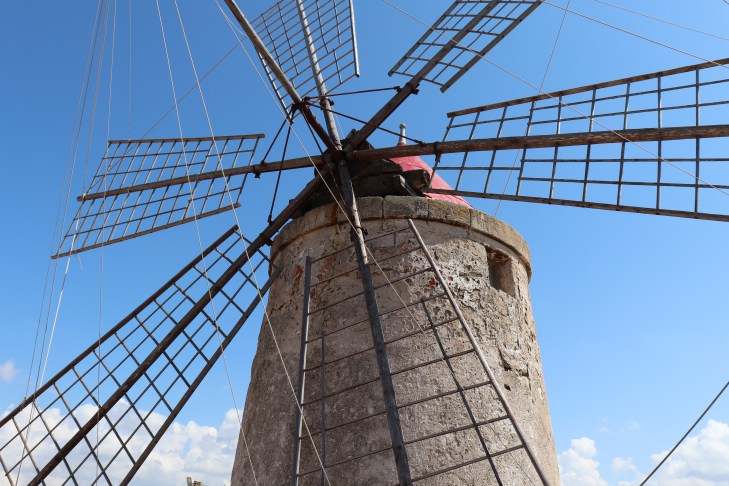
The artifacts are amazing. Screw-auger pumps and pipes are all made from pitched wood. No nails are used as they would rust from the salt. The windmill used for grinding the salt uses porous volcanic stones set in cement so that stones are never grinding against other stones, salt grinds on salt to maintain the purity of the finished product. The gears and shafts of the windmill are also all made of wood. Different types of wood for each purpose: the blades of the windmill, the sturdy shafts and the teeth and cogs of the gears. Oak, olive, and cherry woods are used for strength and durability.
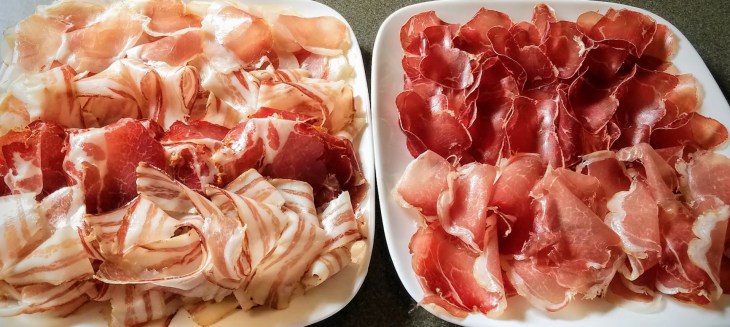
The family is justifiably proud of their high quality salt. The sea salt is used in daily cooking, as well as for several Sicilian specialties, notably the salt cured sardines and anchovies of Sciacca, as well as capers, olives, fish eggs (bottarga), and salumi.

Of course I returned from Sicily with several kilograms of Trapani salt in my bags. I use it for curing my own salumi, which is quite simple to do at home. I use an equilibrium cure method which has the benefits of not producing overly salty meats and allows for the curing time to take a longer time (which is a true benefit when one has a busy schedule).
The equilibrium curing method starts with weighing the meat to be cured. Weighing in grams simplifies things a bit. Once the weight of the meat is known, then weigh out 2.5% of that weight in salt (here is where the Trapani salt is used). The amount of salt can vary anywhere between 2-3%, but I prefer 2.5% as allowing the meat flavor to predominate.
Next is 0.25% in cure #2. Cure #2 is for meats that will not be otherwise cooked. Add the cure to the salt. Now add whatever spices you like to create the desired flavor profile in the finished product. Mix well and pub this all over the piece of meat to be cured. Use all of the mixture, making sure to coat inside any incisions in the meat. I then seal the meat in a vacuum bag, but you may use a zip top freezer bag or other means of sealing. The benefit of the vacuum bag is that it will hold all of the cure against the meat. If not using a vacuum bag, then rotate the bag daily to make sure all sides are equally exposed to the cure. Cure in the refrigerator for 10-14 days, longer if you don’t get around to it or if your cut of meat is very large.
When the cure is complete, rinse the meat with water, wine, or whatever potable liquid you prefer. You can then case the meat with a natural or synthetic casing. This helps to keep the outside of the cut from drying too fast (case hardening), allowing the meat to dry very evenly. Of, if you prefer, then you can just tie up the meat like a roast and hang it up.
Hang the meat in a cool place with high humidity. Many folks just use their kitchen or a cellar area. Others have made special curing chambers from a re-purposed refrigerator held at 50-55F and 70-80% relative humidity. Allow to dry until the weight is reduced by about 30% (less for fatty cuts). This may take several months. I then vacuum seal the meat and allow the remaining moisture to reach equilibrium over another month or two. Slice and enjoy! Here are a few recent curing projects to give you an idea.

Culatello
Culatello is a type of prosciutto cured from the large muscle of a ham, a hog’s hind leg. It is basically the equivalent of a bottom round cut. It is seamed out from the ham and simply cured with 2.5% salt and 0.25% cure #2. Rinse after curing and then tie up traditionally in a hog’s bladder (you can buy these dried on line). Sew the bladder closed with twine and then tightly tie up the cut to hang and dry for at least 8 months. I left out any other spices to just let the high quality pork and salt speak for themselves.

Speck
Speck is a specific cut made from the ham with a thick fat cap left in place. I made this speck using a similar technique on a hog’s shoulder. 2.5% salt, 0.25% cure #2, 2.5% black pepper, 2.5% granulated garlic, 0.25% ground allspice, 0.12% fresh rosemary. Cure and rinse with white wine. Cold smoke with apple chips for 30 hours over three days. Trussed and hung uncased until 30% weight loss.

Coppa
Coppa is cut from the shoulder of the pig. It is the end of the loin muscle where it terminates at the shoulder blade. This recipe is for a spicy version. 2.5% salt, 0.25% cure #2, 0.6% black pepper, and 0.6% Korean red pepper. Cure and rinse with water. Rub the cured pork with more Korean pepper and stuff into beef bung casing. Tie up, hang and age until weight is reduced by 30%.


Tim, You say that you cure then tie/case, case/tie, why do you not case/tie and then cure?
LikeLike
Peter, the casing would inhibit the penetration of the cure into the meat. Tying first also tightly closes any cuts or pockets in the meat where you need the cure to get in.
LikeLike