Summertime is the best for fresh foods and for cooking outdoors. I love making impromptu meals from what I find in my garden, the farmers’ markets, and even my local grocery store that carries fresh seasonal items.
Today’s post shares my approach for a typical summer meal at our house.
Before I get into that, though, I should apologize for the length of time between blog posts. I came down with a nasty virus in the middle of June, and just when I was feeling better, I took off for a week of camping and then two weeks of vacation in San Francisco, the Central Coast, and the Giant Sequoia National Monument. It was great to see all the food being grown in the San Joaquin valley, and I did get to do a little cooking…..but mainly was just eating and enjoying all of the great foods of California.
I came home to a less than well-manicured garden! The first order of business was to make some pesto. I plant a lot of basil, and if it goes too long without being harvested, it bolts, or worse yet, it grows so densely that it succumbs to mildew.
Pruning my basil plants yielded about 12 cups of nice basil leaves. That is enough to fill my food processor about 3 times and makes about 6 cups of pesto. I also harvested a nice bunch of flat leaf parsley from my herb garden. Wash the herbs and dry them in a salad spinner.
A task like this reminds me of my friend Charlie who made pesto by the gallon, and he would have wanted me to have a beer to help the process. Cheers Charlie!

For this much basil, I use the food processor to finely grate 1-1/2 cups of Parmigiano-reggiano or Pecorino Romano cheese. Put the grated cheese in a large bowl.
Place 1-1/2 cup of pine nuts in a dry skillet over medium heat and stir until they give off a toasty aroma.
Replace the grater plate in the food processor with the blade. In goes 4 cups basil leaves, 6 or so sprigs of parsley (big stems removed), 5 cloves of garlic, and ½ cup of the toasted pine nuts. Grind in about ¼ tsp black pepper, and add ½ tsp sea salt. Pulse the food processor a few times. Add about ½ cup of very good extra virgin olive oil in a stream with the processor running. Pulse a few more times. Scrape down the sides of the processor bowl if needed to make sure everything is evenly chopped.

Scoop the contents of the food processor into the bowl with the cheese and then repeat the above process with the remaining batches. When it’s all done, use the spatula to mix the cheese evenly with the green mixture. Pesto!
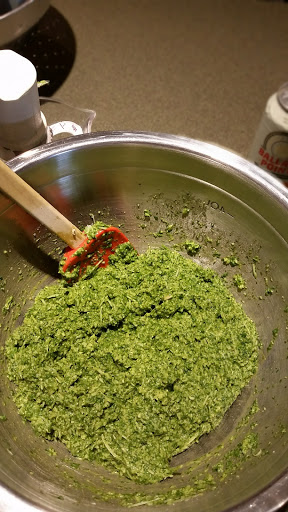
I freeze quarts of pesto in rectangular containers. Once frozen, I cut the block of pesto into roughly ½ cup portions, vacuum seal, and return to the freezer. I put these cubes of goodness into a larger bag to keep them from getting lost in the freezer.
I keep a portion of the fresh pesto in the fridge for immediate use.
Next up was making some Korean-style hot sauce, just the ticket for jazzing up summertime foods. I had been thinking about this for some time, and so here it is:
Korean-Style Hot Sauce
1 cup Gochujang (Korean red chile paste), I used some labeled “Extra Hot”
½ cup Korean red pepper flakes
20 cloves of fresh garlic, washed and trimmed of root end
¼ cup granulated sugar
¼ cup good quality soy sauce (low sodium preferred)
¼ cup yellow miso (I used a variety that included dashi)
1 cup apple cider vinegar
1 cup dark corn syrup
2 T sesame oil
1 T roasted white sesame seeds
2T Roasted sesame seeds, finely ground to a paste
Put all of the ingredients into a large stainless steel bowl and hit it with a strong stick blender (I have a Dynamic Junior Plus model since I was sick of weak home use models), or put it all onto a blender and liquefy until it is well mixed and the garlic is no longer visible. Some sesame seeds and chile flakes will still be visible. Adjust the sweet-tart balance by adding more vinegar or corn syrup as needed.
I put some of this sauce in a squeeze bottle for immediate use, and the rest went into jars. Store in the fridge. I imagine this will keep for a while given the amount of salt and vinegar.
I don’t grow much corn in my garden, but we are fortunate to have several good farmers’ markets near us. If the corn looks good, I buy enough for a few meals. So, off to the market I went to buy some corn, confident it would be good this time of year.
Rant mode: it drives me crazy when I see people stripping ears of corn at these markets. Here is how I pick out good corn. First, I look at the stalk end. It should look fresh and white. If it is darkened, that means the corn was pulled one or more days ago or it has not been stored cool. Next, the silk end should be tightly closed. I look for smaller ears because I prefer corn young. I look at the outside of the husk to check for dark spots to indicate corn worms or bugs. Last, I feel the ear to make sure kernels are developed fully in all rows and all the way to the top of the ear, and smell the corn (it should smell sweet). I usually ask for the variety of corn, but the sellers typically do not know where I live. There is usually one or more stripped ears sitting around, so you can see how old it is and if it is white, yellow, or bicolor.
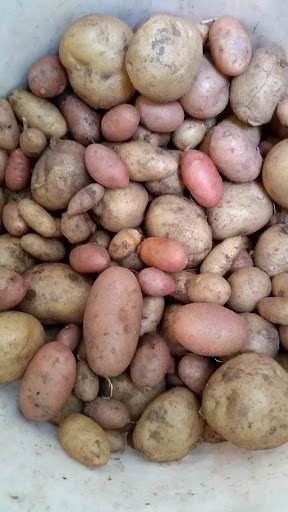
Next, onto the garden. I had some earlier pictures of my potato patch. I planted 4 lbs. of seed potatoes in early Spring, a mixture of Irish Cobbler, Russian Banana, and Rose Finn. They were ready to dig, and I need that patch for the next crop. Four pounds of seed potatoes turned into about 15 lbs. of freshly dug potatoes, enough for several meals.
For my summertime meal, I put about 3T of duck fat reserved from making my sous vide duck tacos into a nonstick skillet over medium heat. This fat has a great taste, especially from the 5-Spice powder used in the duck recipe. No need for added seasoning. Once the fat is hot, add sliced potatoes to form a single layer. Toss the pan every few minutes to coat the potatoes and make sure they are getting brown and crispy all over.

I added chicken leg quarters and some fresh corn on the cob to complete my summertime meal plan.
For a quick grilled chicken dinner, I wash the chicken parts and pat them dry. Rub with olive oil. Place them in a pan in a single layer, and dust them with lemon pepper and Goya Adobo. Make sure they are covered. If I have more time, I like to add chopped fresh herbs and garlic to this, along with some citrus juice or good quality vinegar.
I prepare a charcoal fire in my Weber grill. Place the chicken skin side up over the coals and loosely cover with the lid. Monitor for flare ups and keep an eye on the thermometer in the lid. I like it about 350F. After about 5 minutes, the chicken should have a nice brown crust on the meat side. Flip them over to crisp up the skin side. Check frequently so it does not burn to a crisp. Once the chicken is brown and crispy all over, move it to the sides of the grill. It will continue to cook there without risk of burning. About 25 minutes at 350 and it will be cooked through and juicy.
When the chicken is moved to the edges, it is the perfect time to put a few ears of corn over the coals at the center of the grill. Roll them 90 degrees about every 5 minutes, the husk will char a bit. I find there is no need to soak fresh corn; it has plenty of its own moisture.

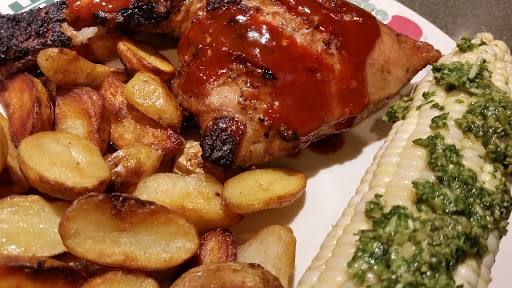
Remove the corn and chicken from the grill and let it rest 10 minutes. Husk the corn and remove the silk. Serve each person an ear of corn brushed generously with pesto, a serving of the crispy duck fat potatoes, and a piece of chicken drizzled with some of the Korean hot sauce.

Summer on a plate.
